
During the forging of a blade, you will reach the annealing stage. This is when you’ve got the final shape desired, and then the blade is heated and then cooled very slowly.
A large card game—or any large tabletop game for that matter—is often very different from a book at this stage. It’s my experience that for a book, you usually finish the entire thing first and then turn the complete manuscript over to layout. It’s then laid out and turned back over to design to review for a last proofing stage.
With a game like this, however, once you reach a certain level of the design—with a ton of work still left, mind you—you turn the material in hand over to graphic design. This includes all the notes you’ve generated to date about the graphic interface the cards need to embrace for the rules and the game play experience. For example where the gold should appear; how the damage track should look; presentation of any text rules; and so on. Then graphics opens up their can of awesome-sauce tools to start making all the scribbles from design look stunning on a card. Often this creates a cooldown period, where design is off working on other elements while graphics works its magic. Then you re-wed any final design/playtesting elements onto the tail end of the graphics side.
With a game like this, however, once you reach a certain level of the design—with a ton of work still left, mind you—you turn the material in hand over to graphic design. This includes all the notes you’ve generated to date about the graphic interface the cards need to embrace for the rules and the game play experience. For example where the gold should appear; how the damage track should look; presentation of any text rules; and so on. Then graphics opens up their can of awesome-sauce tools to start making all the scribbles from design look stunning on a card. 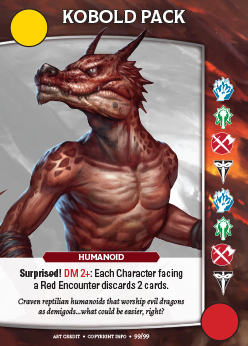 Often this creates a cooldown period, where design is off working on other elements while graphics works its magic. Then you re-wed any final design/playtesting elements onto the tail end of the graphics side.
Unfortunately with Dragonfire, the scope and schedule of the project didn’t allow for that usual cooldown period. And so Matt Heerdt—lead graphics guru for Dragonfire—had to not only deal with the creating the overall graphic design for close to a dozen different card types, but work around design constantly fiddling with the initial sets of data we provided. This created a moving target that made things much more complex across the board. 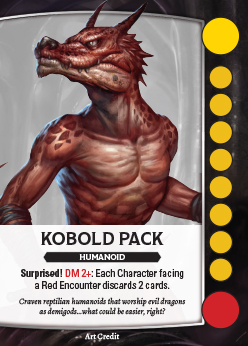 And I’m sure Matt had moments when he wanted to tear off my arm and beat me with it. (Luckily, he didn’t.) Simply the nature of the beast this time around.
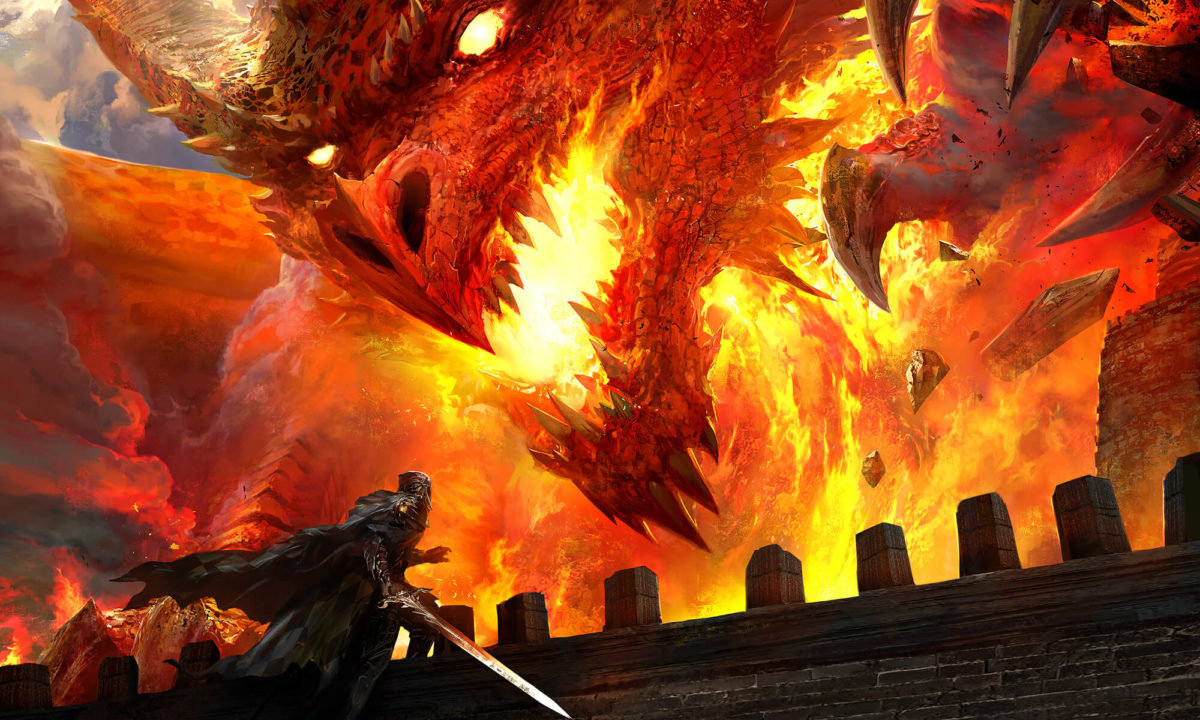
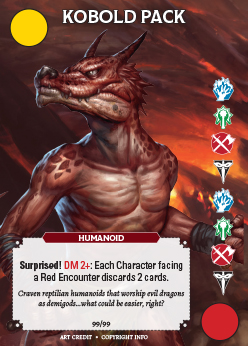
Just as game design can be a really long process, graphic design can be just as brutal. There are a few blessed times, however, when a graphic comes in and it’s 99% there from the start. That happened with the front of the Dragonfire box. But for every card in the game, we went through a half-dozen to a dozen iterations of graphic design. And when it came to the encounters—the stars of Dragonfire, so to speak—it may have reached well past thirty iterations (you can see a selection of those within this post showing a handful of different paths we attempted); there were just so many factors to take into account. 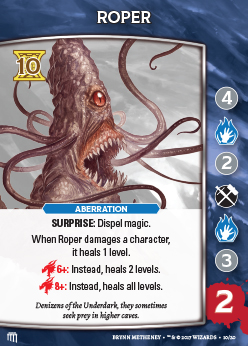 And not just our own design versions—both for the aesthetics we wanted and for the needs of the game play experience—but incorporating input from Wizards of the Coast as well. After all, this is a licensed property, with a wonderfully established aesthetic in Dungeon & Dragons Fifth Edition. So we needed to match up with their requirements as well. Like I said earlier, a lot of moving targets.
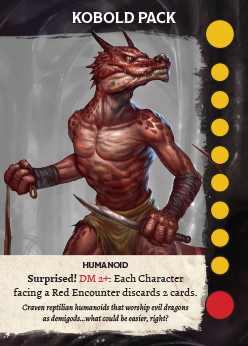
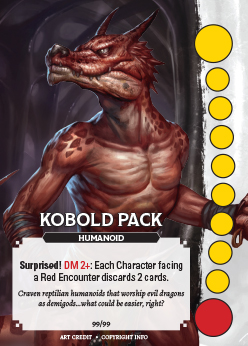
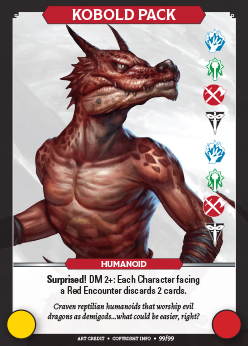
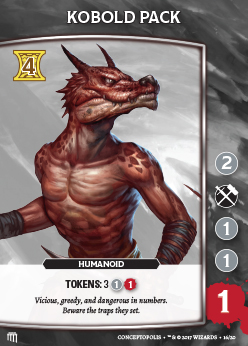
 So many iterations, so many meetings… I remember one where we had pages and pages of twenty-plus iterations spread all over the table, and spent several hours just discussing details. This included pulling out fifteen or so published games and laying out cards from each one on the table. Not to copy anything, of course, but to simply see what worked in other games. And what didn’t. And more importantly, could we pinpoint the whys of both those situations and attempt to address them in our new design. This sometimes led to passionate arguments over X or Y elements on a card, and why it worked in one person’s opinion, and didn’t according to another person. However, as in most things, we finally were able to reach a graphic design that everyone signed off on (the final Kobold Pack card in this post).
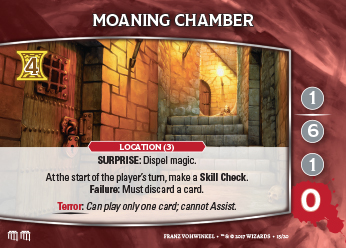
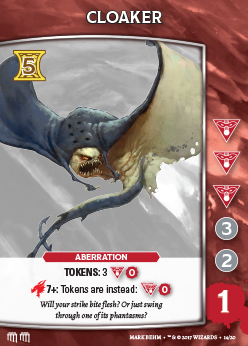
Since you saw all of the iterations of the playtesting for the roper, here’s also the final card for that…as well as two more of my personal favorites in the Cloaker and the Moaning Chamber (primarily for D&D flavor brought out so well in the game play).
For those that previously played Shadowrun: Crossfire, you’ll notice several new elements found on these cards. For example, Location cards, Skill Checks, Tripwire Traits (the “Terror” on the Moaning Chamber), and tokens. All wonderful fodder for future posts.
Until next time!
Randall